I am feeling quite conflicted about my latest make, but perhaps when you hear the story behind how it came into being you’ll realise why.
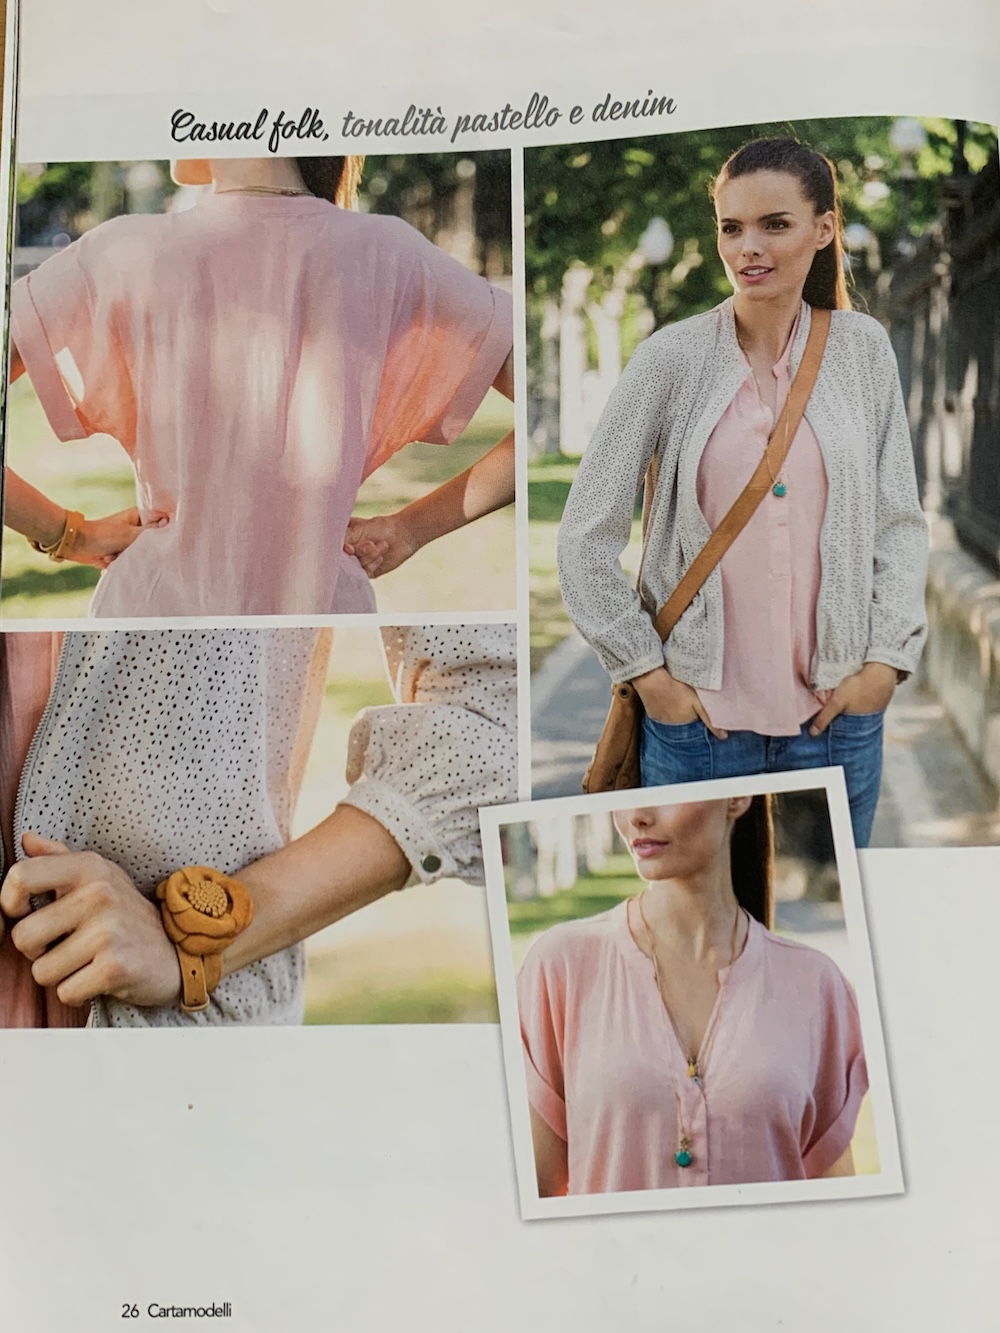
I bought an edition of Cartamodelli in Italy several years ago, but I have made nothing from this magazine so far. I had been taken by the photo shoot below and always planned to make the complete outfit; the blouse, the jeans and the jacket.
Cartamodelli magazine blouse patternCartamodelli magazine: the outfit
I bought a remnant of cotton lawn from Like Sew Amazing just before it closed. I am already missing Sarah and the shop. I didn’t intend to buy it because I have been trying to ween myself off buying fabric when I don’t have an exact plan for it and I have a lot of fabric in the stash too at the moment. Anyway, it is just the sort of floral design I like, with its almost deliberately challenging combination of colours; it has seventies-leaning vibe. I didn’t realise it at the time, but I had bought just enough fabric to make the short-sleeved blouse from this coveted ensemble.
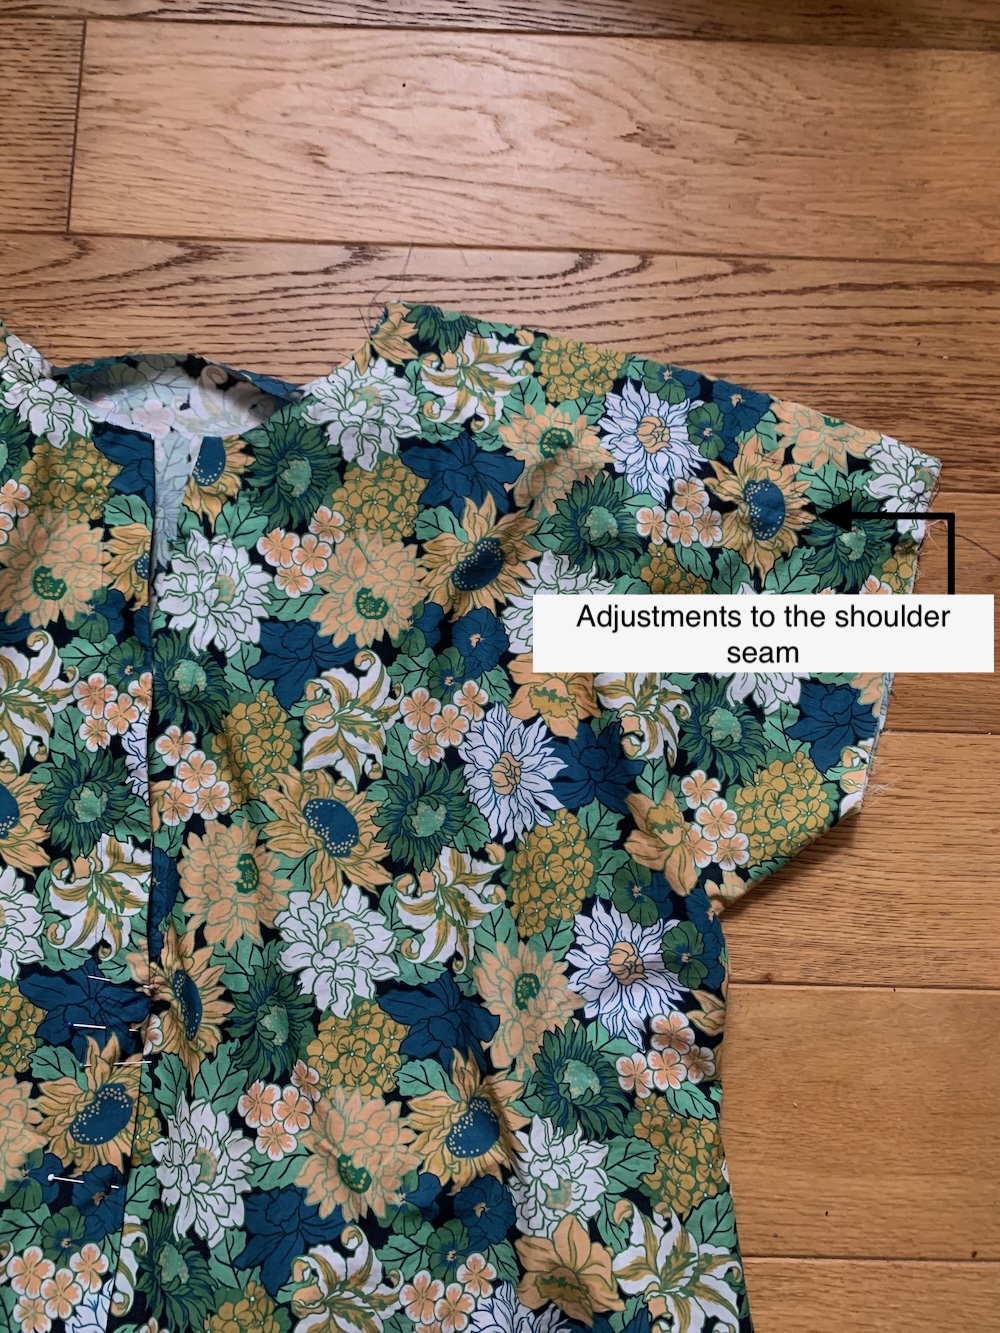
Blue-green floral blouse (cartamodelli)
I set to work on cutting out the pattern, but I was really stumped with the instructions. Being a magazine the instructions were, as usual, pretty sketchy, but I didn’t understand how the front pleat and the neckline worked. This was a real drawback because I had already cut out all the pattern pieces before I worked out how the pleat could be sewn. Of course, this meant I hadn’t done much in the way of preliminary measuring and I discovered that the v-neck was way, way too deep and would have been unwearable. After a huge amount of measuring and trimming I got the v-neck in a more reasonable place. But then I did start to wonder about the sizing of the blouse. How could I have possibly cut this much off it, when I had picked the right size from the magazine? I have sewn from Cartamodelli before, and I remember making minimal adjustments to the pattern. Either this blouse is supposed to be utterly enormous or something is amiss here. I did wonder even at this stage, after all my trimming whether the blouse was still too big. And then, of course, this all had a knock-on effect for the collar. After even more trimming and fiddling I managed to get a neckline that matched the original dimensions as needed for the collar.
After all the horrible fiddling around I was feeling less than happy with this garment, but despite this I persevered and completed it without rushing (I am proud of this mastery of my inclinations!) In a complete deviation from the instructions I chose to self bias-bind the curved hem at the bottom of the blouse. This took a fair while to do, but it’s a technique that works really well with such a curved hem. The sleeve cuffs were improvised too, as I was running out of fabric. Of course, it wasn’t lost on me that if the sizing had been correct I wouldn’t have been scraping around for every centimetre to cut out the cuffs.
Blue-green floral blouse – side view (cartamodelli)
So, here we are with a finished garment that took so much sweat and toil I am struggling to feel anything but hostility towards. I have now tried it on and taken photos and looking at them I am feeling more positive about this blouse. It does feel voluminous, but I think that could be an asset in the summer.
Blue-green floral blouse (cartamodelli) – ample, but surprisingly not huge now after all my trimming
I’ve finally got round to be customary drawings for this year’s plan. I have five spots to fill in the plan and this meant I have quite a few options to consider. I took a slightly different approach this year and created lists under four broad titles; Home, Stash, Mending or refashion and Requiring new fabric or yarn. I then prioritised the items in each list. Here’s my scruffy list:
I suppose some of the items don’t make too much sense so, perhaps a bit of description is required about those that I chose.
1. Tablecloth
We’ve had the same wipe-clean tablecloth on our dining room table since the days when Master Steely was a messy littlun. It’s a bout time we upgraded to something little more sophisticated than cartoon fish!
2. Snake
I suppose this item could have been placed in the Stash list too. There is quite a gap at the bottom of the door from our living room to the kitchen, so I’ve decided to make a snake to stop the drafts. To be honest I haven’t seen such items in a home since the seventies. Perhaps we have all forgotten how to keep a house warm and cosy, whilst not cranking up the heating. I should have made the snake at the beginning of the winter, it isn’t as if I’m lacking in small pieces of fabric that could be used for this purpose.
3. Corduroy jacket
I’m really looking forward to delving into this make. I’m a glutton for punishment and I have a Burda pattern lined up for this. That said, I can tell this will be a very rewarding make and will be a really useful addition to my wardrobe. The pattern is like a shacket, but with a hood.
4. Pinafore dress
This is the Dusty dress I made a while back and that just hasn’t had as much wear as I would like. I like it, but it needs to be lined and then it would work better with tights. Unfortunately, this process will mean taking the whole thing apart. I tried it on yesterday and remembered just how cute and unique it looks and I think it will be worthwhile, even though I’m not particularly relishing the sewing.
5. Jumper
I have to add a knitting item on my Make Nine. This jumper is more ambitious than last year’s hat, given I have never made any knitted item with a button band. However, it will be in a chunky knit, and therefore the knitting shouldn’t take too long.
Here’s the complete Make Nine 2024, including my left overs from last year (see here for more details on these). There’s quite a cosy feel to this year’s crop; including three items I intend to make in wool fabric or yarn. I’ve also added two household items which makes a difference to previous lists.Let’s hope I manage to get through as many as last year.
We’re into February and I’m slow off the mark this year. But before I get into what I think I might make over the come twelve (actually now eleven months) I thought I would recap on last year’s attempt.
Finished 5/9
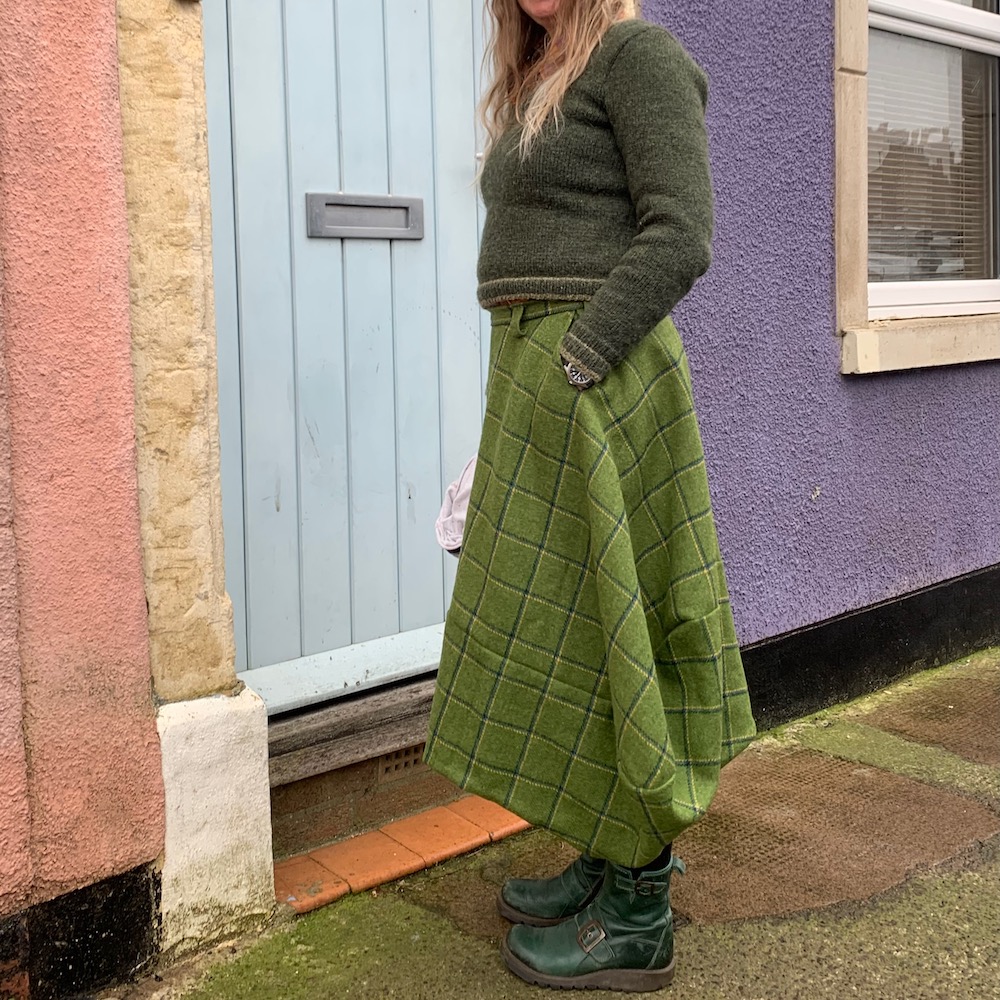
My first make of the year was this zero-waste skirt by Liz Haywood. I love this skirt. It is made of wool, and therefore very warm and yet it is elegant. I can’t tell you how many times I have been complemented on this skirt. I can’t claim that I feel that comfortable with sewing zero-waste patterns yet, but the techniques used were interesting and the instructions guided me through the process well.
Next I made this lovely bobble hat. I reach for this hat again and again I am really happy with how it turned out. I can’t say I am a great knitter, but this is the second hat I’ve made with cables and I feel like I’m getting the hang on things. I absolutely love the detachable pom-pom and I’m tempted to buy another just so that I can swap them over in the interests of variety.
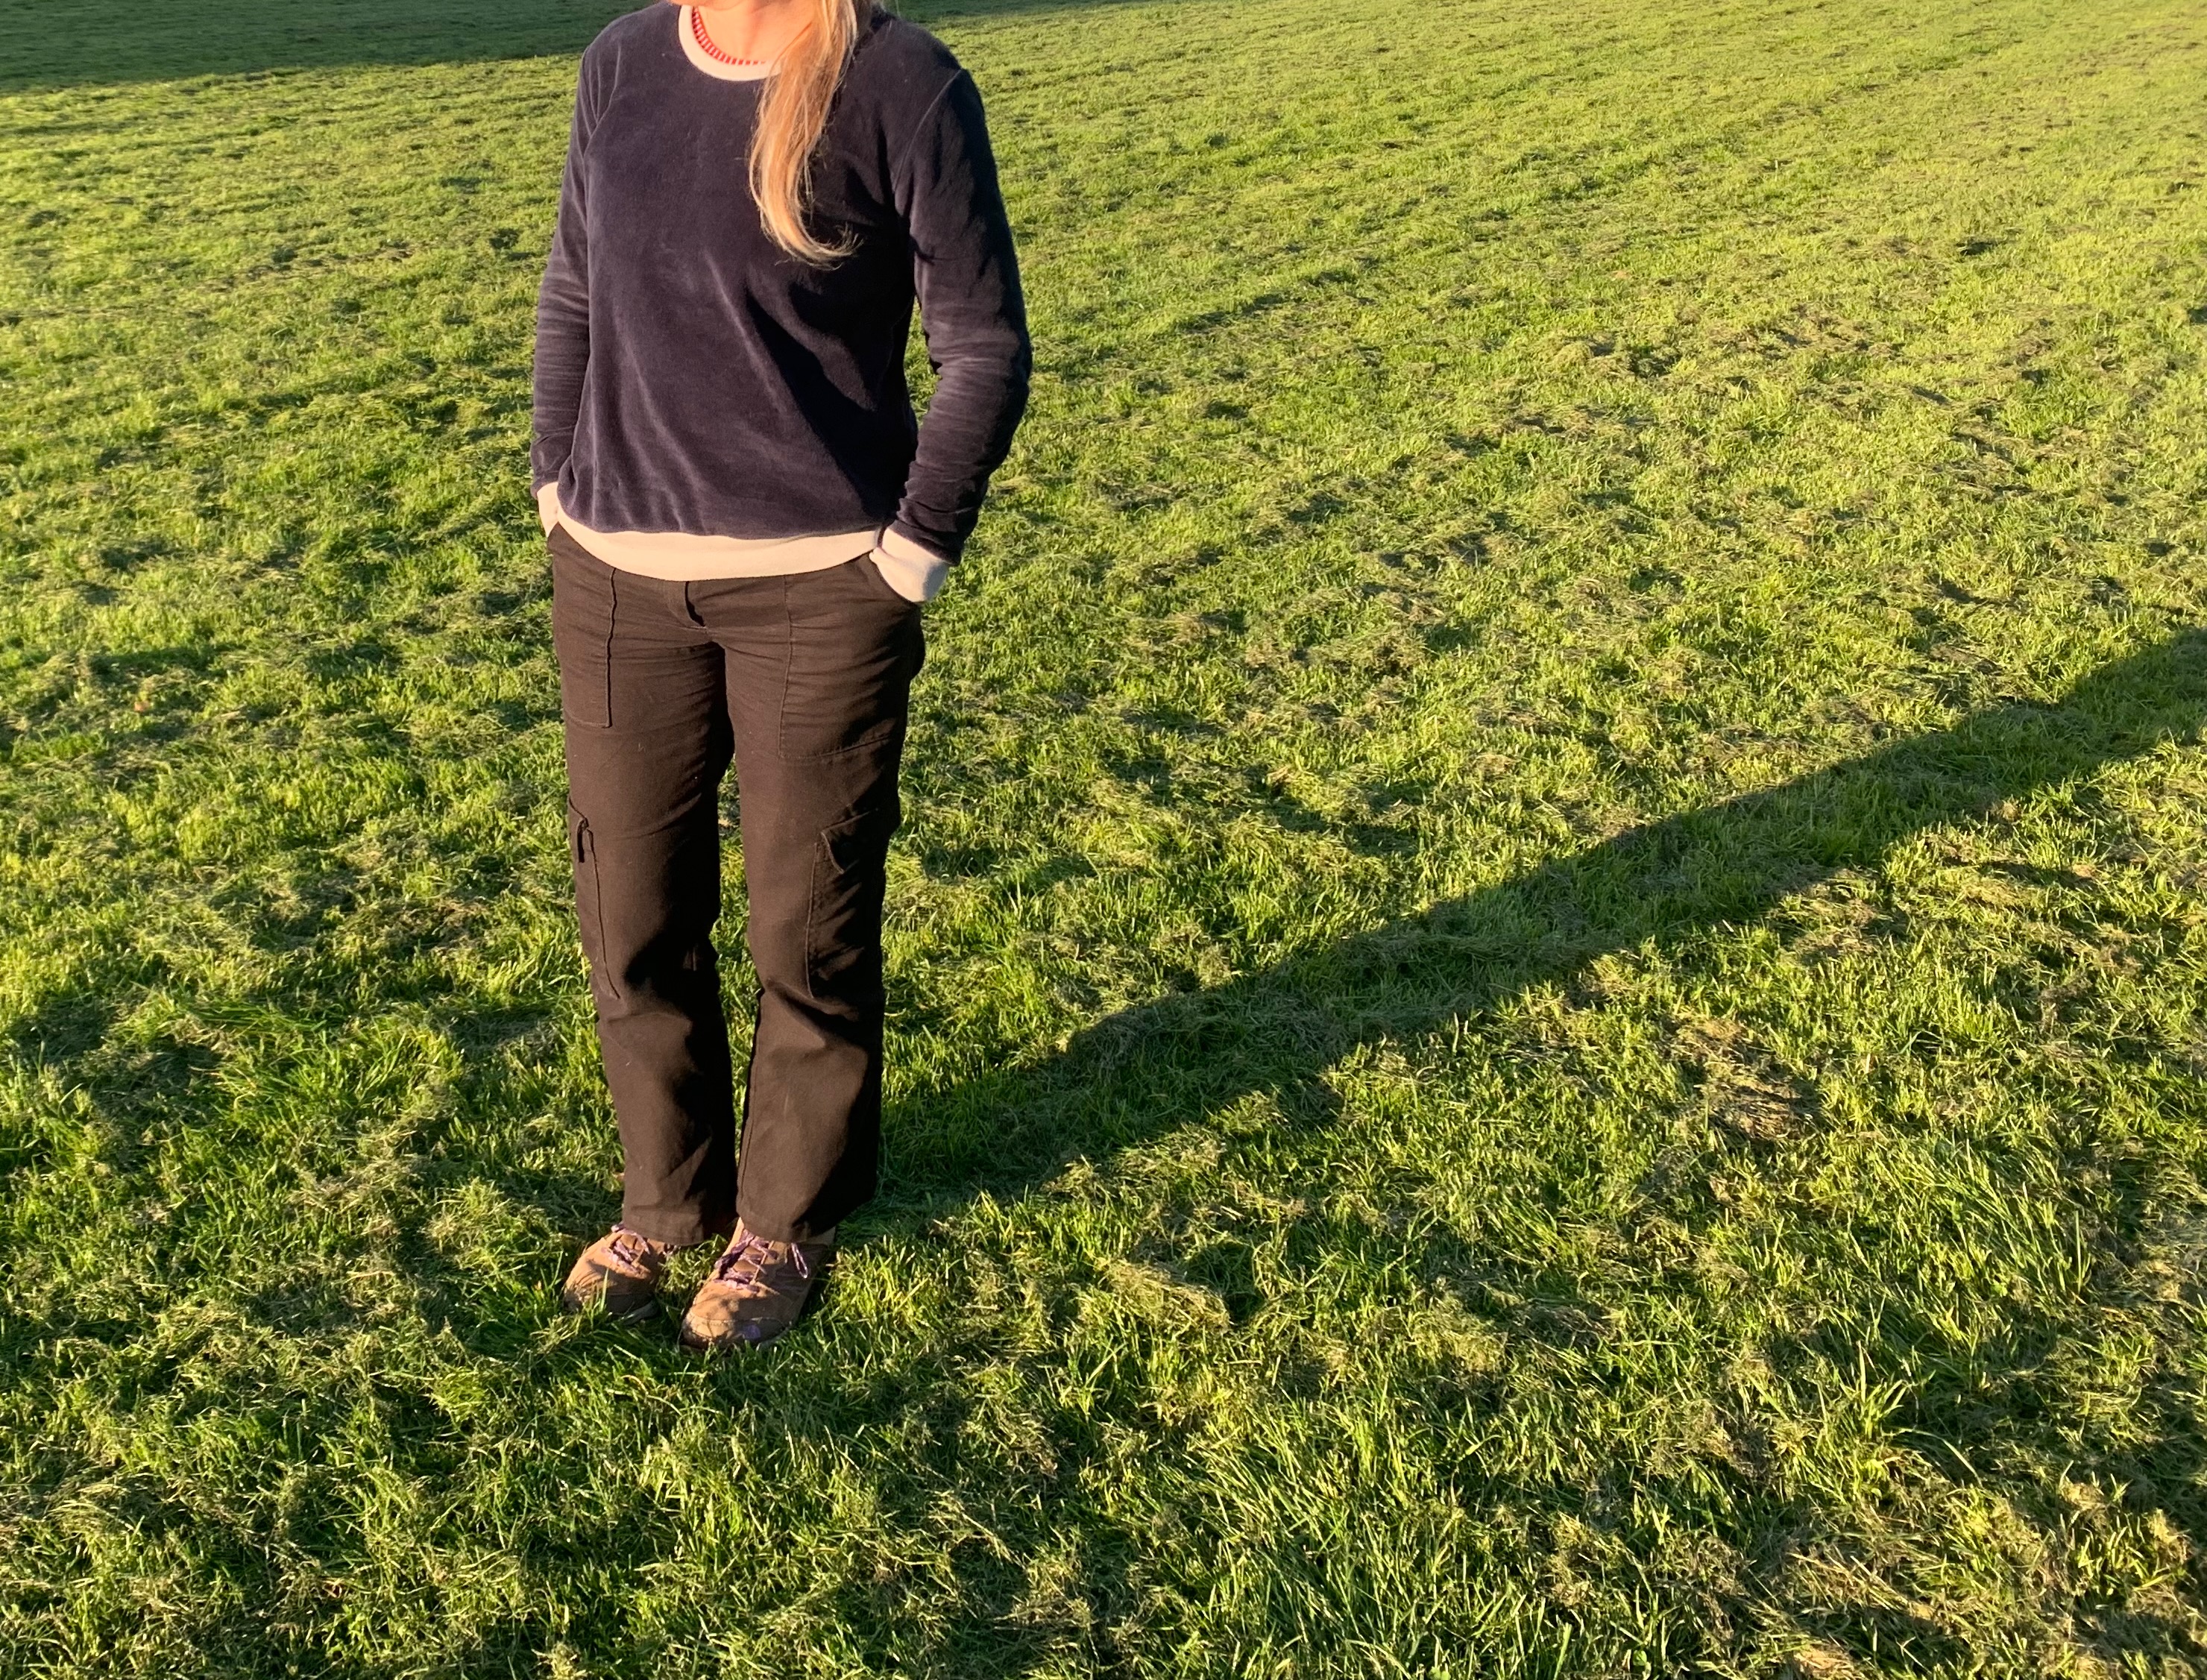
I then embarked on an adaptation of the Nikko Top. I used the front of the Viki Sews Terry Top pattern to create this top.
Also, in the same picture, above I’m sporting a pair of trousers that were on the list. These are the Peter and the Wolf Trousers by Papercut Patterns (an old pattern that is sadly no longer available, unless you can find it second-hand on the internet). This is the third incarnation. I’m not quite so sure about these. I loved my jeans version and I think the stretch on these was greater, so they haven’t ended up as slim-fitting as I would like, but they are certainly wearable, and if I feel the need I could tweak them a bit.
Finally, the biggest make this year, in as far as it was the most adventurous and time-consuming, was my parka. It has been a little cold to wear it yet, as it is only lined with brushed cotton. But I certainly love the way it looks and it might make me feel a bit happier going out in the rain (possibly!)
Not finished 4/9
Just four items remain on the list, and I’m going to keep them there. I realise that some of the items have been languishing on the to-do list for some time but I’m still excited about doing them. Plus, this year I have managed a grand total of five items from the #makenine list so I feel there is plenty of room to add some new exciting projects to my list. I’m hoping to particularly get to grips with adjusting some items to make them more usable and re-fashioning some things in my wardrobe that have great fabric, but have hardly ever been used.
In this post, I’m going to describe how I have been getting along with my waterproof coat project. This project hasn’t been easy at all, see my previous installment here. I’ve encountered lots of challenges including trouble getting hold of all the notions in a matching colour, finding the instructions very challenging (because they are the usual magazine-grade instructions, think Burda) and failing to rein in my ambitions (as ever). I have been using a pattern from the Italian magazine La Mia Boutique.
I haven’t introduced my lining fabrics yet. I selected a brushed cotton lining for the body and hood in a blue and black checked fabric. Because the brushed cotton has a tendency to “stick” to clothes that I will be wearing underneath my jacket, I decided to make the sleeve lining from a more slinky viscose lining.
The insides of my coat showing the red viscose lining for the sleeves and the brushed cotton fabric in blue/black checks for the body and hood.
One of the difficult things about reading and referring to instructions from another pattern is that you suddenly decide that not only are there different ways to tackle the project instruction-wise, but you begin to see features of the pattern that you wish were included in the pattern you are using. In the Kelly Anorak from Closet Core Patterns I saw that there was a great front placket and I just couldn’t resist the temptation to add this to my coat. Obviously I just did a bit of guess work as to the size of the placket. Initially, I made the dimensions so that the overlap wasn’t position far enough over the zip to allow the poppers to be attached, so I had to redo this. I also made the left-hand facing too large and had to trim that. It was certainly difficult to get the dimensions right because this facing had to be folded and it wasn’t easy to work out how that would impact the placket as a whole. Needless to say, the whole process took a lot time, but I was very pleased with the result; not only does it look good, but it will make the coat more waterproof too.
The parka zipped up: Note I haven’t put the poppers on the front placket yet, but couldn’t wait to get out and wear it!
I went completely my own way when adding the lining. The instructions for the Kelly Anorak suggest sewing the bottom of the coat to the lining first and then passing the finished coat through the neck opening and slip-stitching the neck-opening by. hand to close the lining. I decided to sew the hood and the body of the coat together and likewise with the lining and then pass the finished coat through the opening in the lining at the bottom. This meant I could slip-stitch just a small section of the lining at the bottom hem.
I had some problems with making the bottom of the lining neat at the corners and I would say that this was entirely due to me winging the pattern for the lining. I had essentially cut a second coat in the lining pieces and with no instructions I just sorted out the corners as best I could.
Back view: Yes, I can see that the bottom hem isn’t hanging that well. I’m wondering what is up with this – will an extra press help?
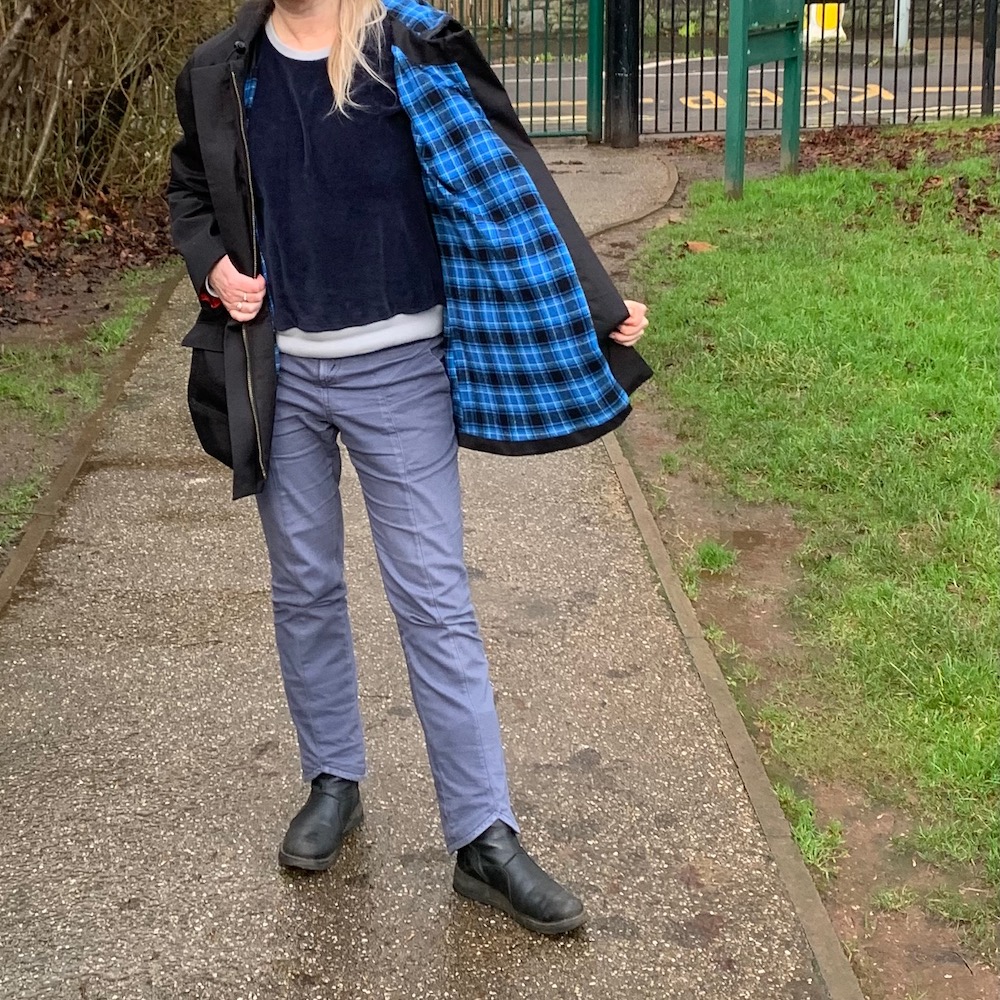
Looking at the finished coat I am so pleased with the combination of the checked lining in the dark blue with the black outer fabric. The pop of colour in the hood and when I open the coat makes my heart sing (it doesn’t take much). These pictures have been taken on the coats first outing today. Looking at the pictures I’m noticing that the bottom hem is not sitting well. I have also had some problems with getting the lining in the sleeves to stop creeping down.
Front View: I am so pleased with the look of the coat when it is open like this – love the lining and also the improved placket.
Now, I am wearing a fluffy velvet jumper underneath and this has a tendency to stick to the lining. But the sleeves are make of a silky viscose lining rather than the checked blue brushed cotton I use for the rest of the coat. I adjusted the sleeve lining a couple of times and also put in some thread chains to help hold the lining in place better, but it is still creeping. I suppose the problems are likely to be due to my haphazard lining-piece dimensions, which is quite possible as these they are a result of guesswork. Another press might help, but if you have any ideas for how I can improve this, it would be greatly appreciated.
Demonstration of the hood – just look at that sky? Am I ready for a downpour?
Just as I was coming back into the house, it started raining again, so I got the chance to see how waterproof my coat is. I could see that the raindrops are sitting on the surface of the coat, which pleased me. That said, I’m still not ready to test my coat out in the pouring rain, which is a bit silly when it is supposed to be fully waterproof! Does anyone else feel this need to treat new clothes gently?
The parka demonstrating its waterproof properties: hope you can see the water droplets “sitting” on the fabric.
My aim throughout with this project was to make a waterproof coat using fabrics made of natural fibres. I used a 100% cotton fabric as my outer layer, 100% brushed cotton for my lining and 100% viscose for the sleeve lining. Yes, I realise that my toggles are plastic, but these can easily be reused. I’m particularly pleased as I doubt this is the type of coat that I would be able to find ready-made at all and gets to the heart of why I like to sew my own clothes.
It’s been an expensive project too, so here is a cost run-down:
Storm system waterproof fabric (black) £35.00
Brushed cotton (blue and black checked) £12.00
Viscose lining (red) £8.00
Brass 2-way Zip £6.65
Eyelets (8mm, black, box of 24) £12.25
Snappers (15mm, black, box of 10) £12.50
Elastic thread (3mm, black) £2.00
Toggles (double) £3.00
Toggles (single) £3.25
Seam sealing tape £10.99
Tie ends £ unknown (from stash)
Total = £105.45
And that looks absolutely horrendous when I’ve added it up! However, there are a couple of caveats to bear in mind. Firstly, I didn’t use all the notions, I have plenty left over (perhaps for another coat or jacket?) and there is still quite a bit of the lining fabrics for other projects, like lining a skirt. Secondly, taking a look at waterproof jackets from Outdoor retailers and the cheapest come in over £100. But of course, they aren’t really comparable, because they are made quite differently and from different fabrics.
I have been wearing the same RTW waterproof coat for some while and over the last few months the zip has got increasingly unreliable. In fact, there have been several occasions when I thought I would need to cut myself out of the coat. While replacing a zip would have been possible, the coat was developing shabbiness around the cuffs and paths that just weren’t waterproof anymore. In short, I decided that I needed a new coat and I thought the time was right to make one rather than buy one.
My first hurdle came with buying fabric. The weather is notoriously soggy in South-West England and so the fabric had to be waterproof, but I was also determined not to buy any synthetic fabric. Obviously, synthetic fabric isn’t very environmentally friendly, but also I find that it just makes me feel like I’m wearing a plastic bag. It took me a while to find suitable fabric. I had seen quite a few densely woven cotton fabrics, which are designed to be waterproof online, but they were frequently very expensive. Cost is especially a consideration when I’m embarking on a sewing venture into new territory; I prefer not to go too expensive, in case I don’t like the result of my endeavours. Eventually, a suitable fabric popped up on the Croft Mill website. It was an ex-designer fabric, so it probably isn’t one that they will repeat, but I have noticed they still have a selection of ex-designer waterproof fabrics. I think this one with the 3-layer “whisper” system is the nearest equivalent to the one I bought. I think my fabric is just in a different colour. The layered structure of the fabric is noticeable – the right side of the fabric is smooth and looks like canvas, the reverse is like a brushed cotton
The pattern I chose is from the Italian magazine, La Mia Boutique. I bought this magazine, via the Unique Magazines website during lock-down, I suppose in lieu of actually making it to Italy. Obviously, this issue has the obligatory face-mask tutorial, but I specifically it because of the selection coat patterns. I picked the “Parka” to use for my project. The parka is unlined and features a front zip, hidden by a placket fastened with poppers, a draw-string waist, two pockets and a hood. The sample in the magazine is made from elasticated fabric (my chances of getting an elasticated waterproof fabric are precisely zero), but the size range is 48 – 54 which is larger than my usual size, so I chose to make the smallest size, after measuring up the pattern against my RTW coat.
La Mia Boutique 12/2020 Parka
However, my challenges didn’t stop there. I decided that I wanted to make a lined coat instead, just to add a little warmth. For the lining I chose two different fabrics; for the body a checked brush cotton and for the sleeves I opted for a more slippery Bemberg viscose lining in red. I decided to use two different fabrics because I really liked the idea of the cosy brushed cotton on the body and hood, but sadly a “fluffy fabric like that would make the coat hard to take on and off. I really don’t care that the two linings are quite different – they are on the inside anyway.
On to the next challenge: the instructions for the coat in the magazine were absolutely awful. They weren’t just in Italian, but very muddled. For example, the pocket instructions suggested following a tutorial on a different page, but substituting words or seam allowances throughout the text – e.g. substitute lower with centre, 2.5 mm with 5 mm. Anyway, it was completely indecipherable. In the end, I copied the patch pockets from my existing RTW coat. I quite like their design anyway, because of the slanted opening and flaps. In fact, I convinced myself that as far as waterproofing goes these pockets would be better anyway, since they would keep the shell of the coat intact and probably be more waterproof.
Patch pockets added to my coat with slanted flap
Then, there was another challenge, I found it really hard to get all the notions in black (or the same colour). I needed black poppers, black eyelets, black elasticated cord, black toggles (both two-hole and one-hole). Eventually I managed to source them all. Some were from Like Sew Amazing and the rest were purchased online. I can really see why buying a kit for a coat makes sense as just gathering all the materials took lots of time and effort.
Once I had all the fabric and notions. I then found that the Closet Core Patterns Kelly Anorak had good instructions to follow, so I started to use those, cross-referencing the magazine pattern for details such as seam allowances. Yes, I know, should have bought the Kelly Anorak pattern in the first place! Anyway, the coat is slowing taking shape.
Waist drawstring added using elasticated cord and a double-toggle.
I made a pair of turquoise cargo trousers a while back. I had an initial problem with the waist size, which was way too large, but I managed to fix that. Now, they are very much a favourite pair of trousers. Comfortable, practical…but just a bit too much of a statement in such a bright colour at times. I have had in mind to make a black pair of trousers for a while, so I basically repeated these cargo trousers but in a black canvas. Of course, making sure that the waist size was actually right this time!
Lekala 5066 cargo trousers in black canvas
The pattern is Lekala #5066. As far as I know this pattern beats all the others out there in terms of great looking pockets. I have seen so many ready-to-wear cargo trousers this year in the shops, I’m just surprised this hasn’t been reflected in the pattern offerings. However, I know that sewing trousers is never as popular as other items of clothing.
Think I managed to get the light so that the details on these trousers are visible!
Lekala patterns are a bit of challenge mostly because the instructions are poor. But, if you have sewn trousers before, I would recommend just using the instructions from a previous satisfactory make for guidance. The trousers are conventional in many ways; there’s a zip fly, patch pockets (front, back and sides) and loads of topstitching. I used the instructions from the True Bias Lander trousers to create the front patch pockets, because I love putting a fancy lining into my pockets. I used the instructions for the Ginger Jeans to make the zip fly. So, do whatever, feels right for you. I would definitely advocate mixing instructions sets to get the look you are after.
Lined pockets using the method from True Bias Lander pattern
The fabric is from Minerva Crafts. It is slightly thicker than the fabric I used for the turquoise pair, but that is intentional. I feel these are going to be useful as a winter season pair of trousers and because they are relatively loose fitting there is room for a pair of leggings underneath, should it get really cold working from home in January.
Leakage 5066 cargo trousers in the sun so it is possible to see the pockets properly!
To finish up, because there isn’t much to talk about with a repeat make, I have been wondering how to style these trousers. I’m wearing them in the two photos above first with a red and white striped t-shirt and then with a blue velvet sweatshirt. I suppose, being black they can be worn with pretty much anything.
When it comes to sewing, I am always late to any party. So, I’ve just started to explore the Viki Sews patterns.
What can I say about Viki Sews? The women’s patterns come in 10 sizes and 4 height groups, which according to their website means you “will minimise the need for making adjustments and ensure a good fit on a range of individual figures”. When I ordered my pattern I got to choose my size and also my height range. Be prepared to select a size based on European sizes and height in centimetres, though. The PDF of my pattern then becomes available in my account for downloading.
The t-shirt I chose is the Terry t-shirt, which is a hip-length, fitted t-shirt with a crew neckline and long sleeves. There are two features which make the t-shirt stand out; the front consists of an upper and lower bodice, resulting in a cutout above bust level. The sleeves are extra long, reaching well down the hand and are slightly flared.
If you are expecting a review of this pattern, this post might be a little misleading, because essentially I decided to only print the front of the t-shirt. After all, (without making this t-shire sound like a reverse mullet), the front is definitely where the party is! For the rest of the t-shirt, I essentially took the back, sleeves and neck band from the True Bias Nikko Top. The reason for this decision was that I didn’t see the benefit of adjusting another pattern to fit me, when I already had one that fitted. Of course, that meant changing the front so that it was higher at the neck to accommodate the Nikko top’s neck band and a little jiggling to make sure that the armscyes lined up appropriately. Finally I didn’t quite have enough length to use the long sleeves from the Nikko top, so they are about 3/4-length and finished with the sleeve band from the Cashmerette Concord t-shirt.
So, to describe my Franken-top in one sentence: It is a 3/4 length sleeved t-shirt, with a cut-out above the bust and a mock turtle neck.
Viki Sews Terry T-shirt: Note the resident cat – this is not my cat!
The fabric I chose, was a black cotton-elastane jersey with cute skulls on it from Minerva Crafts. For reasons of economy and the sheer irritation with too many off-cuts I struggle to find uses for, I decided to buy only 0.8 metres. I suppose I should be pleased because this means I have made a t-shirt for a tenner!
The most interesting thing about this project for me was experimenting with sewing with a twin-needle. I know that this is a basic technique for many people sewing knits. However, with an old Singer machine, for which I don’t seem to have a manual and half the attachments have been lost, it did provide a challenge.
I found a manual online and it states that it is possible to put two needles in the machine (instead of a twin needle) and that I can thread these two needles in a similar fashion just put the two threads either side of the tension disk. I had to improvise with a chop-stick and a bobbin to create the set-up for the second reel (see the photos below).
Twin-needle threading on a vintage Singer machineTwin-needle threading on a vintage Singer machine: top threads in black, bobbin thread in white nylon.
Once set-up the stitching was really lovely. I got two lines of stitching on the front and a zig-zag on the back and it was actually a really stretchy finish.
Hem using twin needles on cotton-elastane jersey. This photo shows the hem on the front bodice cut-out.
I think that one of the most difficult things about this design is that everyone is shaped / proportioned somewhat differently and I really wasn’t sure how this cut-out was going to shape up. Looking on Instagram the cut-out appears quite different in size on different people and indeed the fit around the cut-out and shoulders varies too.
Viki Sews Terry T-shirt: I know that I have had a photo-bombing cat (not mine) in the past. For the record, this isn’t even the same cat!
At first, the most noticeable thing for me was the cut-out was very small. Somewhat boldly, I decided rather than unpicking I would just cut off the seam from the top bodice and re-sew. The cut-out is bigger now, and while not quite indiscrete, certainly more daring! Or perhaps I could describe the look at glamorous? I don’t know! The front was also a little flabby around the shoulders on me and so I pinched a little in and re-sewed a small portion of the armscye seam. I now think the fit approximates the vision I was trying to attain.
Having worn the top out one evening, I have noticed that on occasion the seam of the upper bodice can creep upwards. I’ll thinking about adding a few stitches to keep it in place. At least that is a problem with the upper bodice, rather than the lower bodice, which means it thankfully doesn’t wardrobe-malfunction.
Viki Sews Terry T-shirt: Stylish with skulls!
For me, this t-shirt isn’t an everyday item, but an interesting top to wear out in the evenings. I may make another of these, or least try the sleeves from this pattern, which I didn’t get to use due to lack of fabric. With the collection of t-shirt patterns I have now, there are plenty of options for mixing and matching to make interesting t-shirts.
I made some pyjamas a few years ago, using the loungewear set from Peppermint Magazine. The set comprises a three-quarter length trouser and a short-sleeved top. Previously, I made two long length trousers, a pair of shorts and the top (as designed) from this pattern. I used some beautiful Ankara fabric.
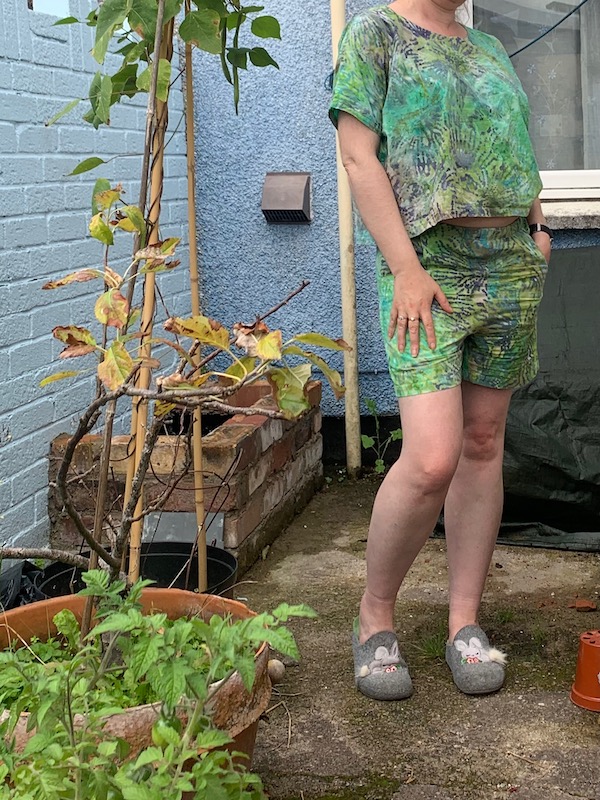
This time, I specifically wanted some lounge wear for my holiday in Italy. And as it is hot out there at the moment, I needed a pair of shorts. I was in a bit of a rush and picked out some cotton batik fabric from Fabric Land. I only bought 1.5 m, but it did turn out to be sufficient to make the shorts and a top.
The make is very simple. I like the pockets in the trousers; even though I leave tissues in the long-length trouser versions which I wear in winter. (Nothing better than finding post-wash flaky tissue in a pocket!)
I did change the top a little. This pattern is simple and great, but there is one thing that I think should be pointed out about the drafting of the top. The sleeves taper as shown below on the sleeve on the right below and the pattern calls for a 2 cm hem. As drafted making this hem is difficult because the lower edge is essentially narrower than further up the sleeve. So, I altered my pattern to widen for the width of the seam allowance so that the hem is easier to sew. I also did away with the curved hem, but that was because I only had just enough fabric.
I suspect there will make many more of these loungewear sets. The ones I made previously are getting rather thread-bare in places and I know I will need some new long-length trouser versions for winter.
I stepped away from my #makenine2023 challenge list to create this fun item. I have had an eye on the Stitch Witch Tudor blouse for a while. My initial thought was that it should be made in a plain linen, but I got distracted and fell in love with this cute hallowe’en print.
Stitch Witch Tudor blouse in spooky cat fabric
The fabric
The fabric is from Like Sew Amazing. It is a Ruby Star Society print and features a medley of spooky cats, some as skulls and others with a third eye. I was also taken with the colour combinations of teals, blues and purples against the black background.
The pattern
The Tudor blouse is apparently inspired, by the square, sixteenth century necklines. I think this gives the top a unique flavour. In other respects it is a modern pattern, there are bust darts and the sleeves use elastic. The best thing about the Tudor blouse, however, is that is comes in two versions; there is the standard one with the buttons at the front, and a wrap hack. There is also a short version, which has five buttons down the front. I made the long version with the seven buttons at the front. Although I would say that the long version isn’t very long, it isn’t a blouse you can tuck in. I imagine the short version would be quite cropped.
I did make quite considerable adjustments to the pattern to get a good fit. The design means that a reasonably tight cut is required. I used the A/ B cup as a starting point. First of all, I made sure that the front was adjusted to according to the bodice sloper I have made previously. This essentially meant that the bust darts were raised and increased slightly. For the back, I substantially increased it to accommodate my wide shoulders. I suppose, you might think I should have gone for the large size and / or used the full cup version. When I looked at the cup size it was way bigger than needed and the wide back adjustment is something I always do on smaller sizes. Essentially, I’ve always added with my adjustments rather than subtracted. Is this the easiest way to do things, I don’t know. Does anyone have any thoughts?
Stitch Witch Tudor blouse
The sewing instructions are easy to follow. The only drawback to this pattern is that it isn’t possible to try it on easily until you get close to the end of the construction. You really need those sleeves in place to get a realistic idea of the fit. So, I had to have a lot of faith in my adjustments.
I deliberated a long time over the buttons, and made my own covered buttons using left-over bits of the fabric. I chose to make buttons specifically using the pentagrams from the fabrics design. Was this overload? Probably, but there isn’t anything subtle about this print.
I grit my teeth through making the seven buttonholes! I used up some metal self-cover buttons from my stash, which were actually a little larger than the recommended button size. I think that the buttons would probably look better smaller, but then I wouldn’t have been able to get the pentagrams sited so well on them. It’s a compromise I can live with.
I attempted to pattern match throughout. Unfortunately, in real life I move and the cats at the front slip out of alignment. It’s probably a result of those very large buttonholes. Perhaps fiddling with the button placement might help.
Stitch Witch Tudor blouse: Behold the slightly off pattern matching and the pentagram buttons
The Outcome
I am really happy with the fit of this make. I made it snug around the bust, but with enough expansion around the belly for it to be comfortable.
I’m not used to wearing short tops, it is quite a deviation in style for me. But I think the long version of this blouse isn’t very short on me, and rides just slightly above the waistband height of most of my trousers and jeans. I am very short-waisted so I suspect that most people will find the long version quite short, and the short version very cropped. I did look extensively on Instagram to try to work out how this would look on my body, but of course, there is no substitute for trying it out for yourself.
The inaugural outing for this top was to a local gig. It was a warm evening and it was just the right thing to wear in the hot venue. I think the top looks good with the teal cargo trousers, but also with jeans.
All in all, this was an enjoyable make (apart from the buttonholes). I think the pattern has the potential to be made into really versatile garments, that can look casual with jeans, or more dressed up. There are loads of versions on Instagram and it really is a very inspirational to just take a look at them. This top works great in so many people’s individual styles.
Finally, I would like to make another version, this time in a sensible plain linen. I would like to choose a colour that would work with these wrap trousers. Yep, those trousers that I have yet to find a top that I feel works well with!
I knit so very very slowly. When I buy wool, even Meg in No Frills Knitting says, “See you in six months time”! This means that I like to start my knitting projects in spring, because if all goes well I will finish in the summer, or if it goes pear-spaced I still have six months to sulk and then fully turn things around. This time though, all was well (ish – of more later) I made this without too much swearing (although Mister Steely might testify otherwise).
Finished Rowan Madison Hat with pom-pom
The yarn and the pom-pom
My yarn came from No Frills Knitting and is an alpaca / wool blend. I chose it for its delicious softness. It is officially black, but with a little teal fluff in it. The pom-pom came from Bath Christmas market, and is a TOFT alpaca wool pom-pom
Rowan Madison Hat: Shortly after starting the project: pom-pom and yarn
The Pattern
I used the Madison pattern from the “Beanie Style” booklet from Rowan. I was taken with the easy-looking cables, and the very wide ribbed brim. I have a very small head and I thought the adjustable nature of the brim might work in my favour.
Rowan Madison Hat: A deep ribbed brim
I seem to have a special ability to find patterns with problems and this was no exception. For working in the round the cast-on is wrong, it should be 108 stitches (a multiple of 3) and then this should be increased to 110 stitches (a multiple of the 22 stitch cable repeat) as suggested here. What is even worse is that there is an errata for this pattern is also wrong! There is also a mistake in the round 3 of the crown, which is easy to work out because the repeat should be symmetric (actually palindromic) and the instructions aren’t. Again, not corrected properly in the errata. Anyway, they weren’t catastrophic errors, irritating, but I was fully able to sort them out. It’s a shame because as a hat pattern it is good pattern for a novice like me, but if this had been my first attempt at a hat I would have thrown my toys out the pram. What I can’t understand is why these patterns can’t be checked properly. It doesn’t mean you have to knit the item either. Most errors in knitting patterns seem to be the maths errors, which can easily be checked e.g. are the number of stitches a multiple of the repeat? if I decrease by x stitches is this reflected in the total count for the row?
Rowan Madison Hat: A Lego figure villain’s hat?
The outcome
Yes, I have made a few errors in my hat, but it has ribbing and it has cables! It is beautifully soft, as planned. I tried it on first without the pom-pom and I think it may have a bit of a “Lego figure villain” vibe. But with the pom-pom it looks much better.
The pom-pom has a popper attached to it. I think this is a great idea, because it means I can remove the pom-pom, which will come in handy when it rains. I don’t want this lovely fluff of furriness to get wet and hang limply, a sad shadow of its former plumpness!
Rowan Madison Hat: A removable pom-pom!
It’s too warm to wear it now, but it’s rather wonderful to have a hat waiting for me when the cold weather arrives.