
These days with sewing I don’t often get the opportunity to venture into completely new sewing territory. But lingerie is still a large unknown for me. My Mum bought me a Bra Making Kits from The New Craft House for my birthday last year and I finally got around to sewing it up.
I thought that it would be easier to start with a kit. My reasoning was that it’s difficult enough trying to order fabric on the internet, but trying to order bra-making stuff, when you don’t know what it’s called or what exactly it looks like, would be impossible! Also I liked the idea of having all the individual items tracked down for me, as in the UK bra-making accessories are not that easy to come by.
The kit I have is in white and it includes the following:
- Madalynne x Simplicity 8229 bra pattern – includes sizes 32A – 42DD
- French stretch lace
- White mesh lining
- Plush backed picot elastic
- Channelling
- Narrow elastic
- White strap elastic
- Gold rings and sliders
- Hook and eye
The only thing I had to order and wasn’t included in the kit were the underwires. I ordered these from Elise Patterns. There is a handy guide on the website here for selecting your size.
When it comes to sizing, I measured myself according to the Simplicity pattern instructions. This made me one size bigger (in cup and band size) than I would have bought in the shops. I must admit I queried this and was tempted to disbelieve my measurements. But after looking at a few reviews online, others mentioned that the sizing ran a little small and I went with the suggested size.
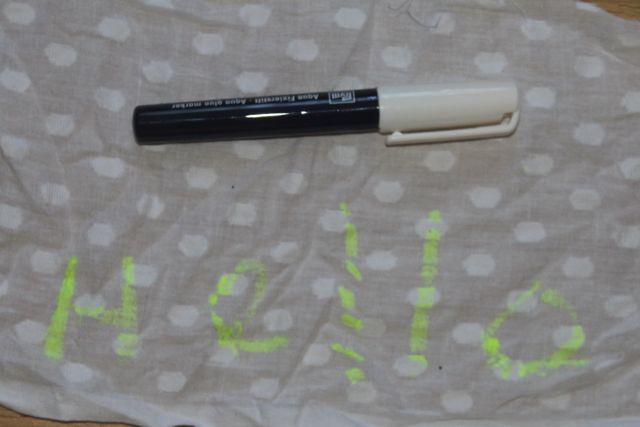
The pattern suggests using a spray adhesive to glue the lace to the mesh lining and cutting these two layers together. I went for a cheaper option of a glue pen. I also thought that the pen would be useful for temporarily gluing knicker elastic or lace to fabric, and so get more use. The glue is a neon green when you first apply it, which is pretty alarming, but once it has dried it becomes colourless and doesn’t show at all. It apparently washes out as well. The glue option probably made the cutting slightly more fiddly, but I succeeded nonetheless.
The construction wasn’t too difficult, although I wish I’d found this video online before I started, which shows Madalynne making the bra. There were some good tips in the video and it would have made the construction easier. I particularly regret not using the cup construction method which gives a much better finish than the inside of my cups. I have quite a visible seem inside my bra – I followed the instructions in the pattern. Still, this is only my first bra and I need to assure myself that perfection is not necessary!

I am pleased with the fit; in fact, I have been wondering if I have been wearing the wrong size of bra for years. Although, there are two things that bother me. Firstly, I cut the strap elastic as directed and once I’d tightened the elastic the rings were positioned awkwardly on the bony part of my shoulders. I think I will remedy this. On my bought bras, the slider and rings are positioned after adjustment about half-way up my back which is far more comfortable. Secondly, I think I would like the band a little tighter. At present I am using the tightest setting on the hook and eye. Given that it is summer, I suspect this may feel too loose once the colder weather arrives. All in all though, I believe that the fit is pretty much spot – a surprise for my any first make of a completely different garment.

I do have a little problem with the sides of the bra; they seem to wrinkle up when I wear it. I’m not sure if this is a fit problem or whether adding something in the channeling to stiffen this area might help. It doesn’t bother me when I wear it, but I have noticed that all of my shop-bought bras finish just below the cups, but this style is quite a bit longer. I wonder if anyone else has seen this too?
I was surprised how much I enjoyed making the bra as when I try to break new ground with sewing there are usually some tense moments. The rest of the Steely clan are accustomed to tip-toeing around me (and the growing, and potentially spiky mountain of fabric in the middle of the living room). I think it helped that the make was a small project both in terms of the fabric required and the time involved.


There are plans for more bras. I’d like to make some different colours – I’m a great believer in making underwear in just as many colours as outer clothing. I also would like to investigate making a t-shirt bra or a bra that uses foam lining (Need I remind my readers of how a thin t-shirt can look without adequate underwear?) Do you have any suggestions for a good bra that fits this description? Has anyone tried any of the Booby Traps patterns – there are a wide variety of styles and this one looks promising? Or the Boylston pattern from Orange Lingerie?

June 19, 2017 at 8:47 pm
You’ve done a good job with this – my first (and last) attempt was awful
June 19, 2017 at 9:52 pm
Thank you. Were you using the same pattern?
June 20, 2017 at 6:58 am
No, Elan 645. It was part of a sewalong. I did a great toile and messed up the final thing spectacularly
June 29, 2017 at 11:16 am
What a shame. Perhaps I’ll look out Elan patterns – never heard of them before.
June 20, 2017 at 6:23 am
Nice well done. I made this pattern a few months ago and it’s waaaaay too small for me. I’ve since bought the harriet bra pattern which I’m hoping will be a better fit
June 29, 2017 at 11:04 am
Such a shame. Good luck with the Harriet!
June 21, 2017 at 7:27 pm
Well done! I’ve definitely not broached underwear territory yet – this looks great! 🙂
Pingback: #MakeNine2022 – Ambitions for the new year | Steely Seamstress
Pingback: #MakeNine2021 When I can’t sew, I dream….Underwear Part 1 | Steely Seamstress
Pingback: #MakeNine2022 Madalynne x Simplicity 8229 Underwear Part 3 | Steely Seamstress
Pingback: Improved t-shirt fit: some initial thoughts | Steely Seamstress