Steely Seamstress

Sewing for life


3 Comments

Sewing The Seventies: 1978

“Now is the winter of our discontent” is the opening line of Shakespeare’s Richard III, but it’s also the phrase applied to the events of the winter of 1978 – 79. In September, the Prime Minister, James Callaghan announced that he would not call a general election despite being ahead in the opinion polls – “I am not proposing to seek your votes because there is a blue sky ahead today.” It was a stance he would regret in the coming months.

Later that month, 23 Ford car plants closed across Britain due to strikes. The Government had introduced pay policies throughout the 1970s in order to combat rampant inflation. Part of this policy was a guideline for pay rises to be capped at 5%. Sanctions would be imposed on companies that chose to breach the pay policy. To bring an end to the strike, Ford offered their workers a 17% pay rise and decided to accept the sanctions. The Ford workers accepted the deal.

This outcome though, seemed to signal that the government had no way of enforcing its pay policy and other industrial disputes quickly followed. Bakers went on strike and bread rationing was brought in as a bread-buying rush got underway in Bristol. The city’s smaller bakers step up their production to meet the demand.

Main brand bakery workers strike

Main brand bakery workers strike

The Times newspaper closed for nearly a year. A smaller 3p edition of the Bristol Post appears towards the end of 1978.

3p edition of the Bristol Post

Large numbers of the lorry drivers working for oil producers, BP and Esso began an overtime ban in support of rises of up to 40% and the army were put on standby to take over from the tanker drivers if the disruption of oil supplies developed into a crisis.

I decided to try to make a cheesecake from the Farmhouse Kitchen book. Now, I must admit that I am renowned for my inability to make a decent cheesecake. I try all sorts of recipes, but it’s usually unsatisfactory. This cheesecake was an Orange Chocolate Cheesecake and on paper had the approval of all the family. It seemed quite easy to make as it was a no-cook type of cheesecake and here it is in the tin:

Chocolate Orange Cheesecake

Chocolate Orange Cheesecake

Well, sadly it didn’t really set very well, but it was actually rather yummy. The cheese layer had a great citrus flavour and wasn’t too sweet. The chocolate biscuit base was particularly good. I think I can take the blame for the cheese layer not setting properly. I used vegetarian setting agent rather than gelatine. Perhaps with more of this added to the cheese mix it would set, I must have just got the quantity required wrong.

Today has been a little warmer and I chose an outfit that included my Butterick 3065 jeans and a shirred sun top made from a Burda pattern. I think that shirring was quite popular for sun dresses in the seventies. It wasn’t the warmest of outfits to wear even with the cardigan. Apparently the snow is due to arrive again tomorrow, so I’ll be reverting to something warmer.

Hippy Jeans and Shirred Top

Hippy Jeans and Shirred Sun Top


9 Comments

An unseasonal make

This poor top has remained unfinished and unloved in my stash for many months. I was just about to put in an extra effort to finish this top during August, before a long weekend. But the weather forecast suggested that it wouldn’t be worn, so I put it off. In fact, since I haven’t been anywhere hot this year and it hasn’t been especially hot in the UK this year, sadly I don’t think I would have worn it anyway. Anyway, it’s now December and I need to diminish my stash before it takes over the living room, so with just the spaghetti straps and the hem to add, this was easy to finish.

The fabric is a cotton lawn that I picked up in Fashion Fabrics. The bright and cheerful hot-air balloon fabric really caught my eye. I decided to use a pattern (Gathered Tube Top 03/2012 #125) from the Burda magazine I’d bought in Italy. Actually, it isn’t much of a pattern, more of a set of instructions, since the top is constructed from just two rectangles of fabric!

Air-balloon top

The technique used for shirring here is a little different from that which I’ve used before. Previously I’ve always hand-wound a bobbin with shirring elastic and therefore added the elastic as the lower thread when machine-stitching. The Burda technique suggests laying the elastic in a straight line on the wrong-side and zig-zagging over it. To be honest both techniques work well. Although, there is the added advantage with the Burda technique that you can adjust your top by pulling more or less on the shirring elastic to tighten or loosen it.

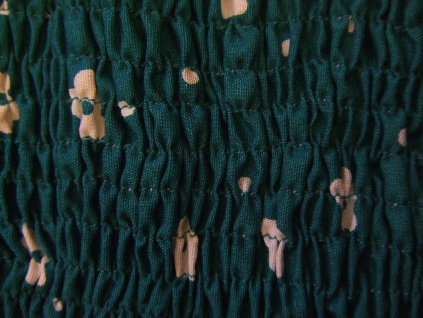
Close-up of shirred detail

I felt a little wary about wearing a strapless top, so decided to add some spaghetti straps, which are just turned tubes of the same fabric. I think that this top is most likely to be used to go to the beach. It slips on and off easily and would be a good cover-up for going into a cafe or a shop.

Now I just need to dream up a beach holiday for next year, unless we have an unexpected heatwave in March!


1 Comment

January Quick Make – Covered coat hanger

I have been very keen to try out shirring for a while. I can see great possibilities for creating tops, but I haven’t had the courage yet to launch into a big project yet. I thought that creating a padded hanger would be a perfect practice project. Obviously, it is possible to create these without the shirring, but the elasticity of shirred fabric, means that it will easily mould to the shape of the coat hanger without need to create a “hanger-shaped” pattern and I think it just adds an extra frilly-ness to the whole thing.

Apologies, for the quality of the photos on this post. I will improve them when I can. There has been nothing but rain for weeks and the light is really poor for taking photos. Anyway, onwards with the post.

You will need:

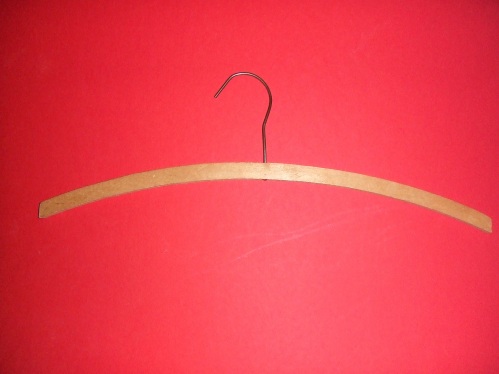
Wooden coat hangers

Wadding

Fabric of your choice (I used cotton)

Shirring elastic (It only appears on the inside of the garment, so don’t worry too much about colour matching. White or a dark colour will suffice for most projects)

Loop turner

Matching Ribbon

DSCF2349

1. Unscrew the hook from the wooden part.

2. Cut a long strip of wadding roughly 5 cm wide and wrap it tightly and evenly around the hanger. Wrap more wadding around the coat hanger if you wish the hanger to be more padded. Use a couple of stitches to hold it in place. Mark the place where the hole for the hook is, so you can find it later!

DSCF2353

3. Next work out how much fabric you need for sewing the cover. First, work out the height required. Lay the hanger on the fabric and work out the amount required for the front and back, plus 1cm seam allowance for both sides. This worked out as 16 cm for my hanger.

As a rule of thumb when a fabric is shirred the width is reduced roughly to a half of what it was. So measure the length of the hanger and add seam allowance of 1cm at each end. This worked out as about 50 cm for my hanger. I therefore worked out that I needed 100 cm in length. It is better at this stage to calculate the amount of fabric to be used generously, it can always be trimmed afterwards.

4.  Cut out a square of fabric corresponding to the height (16 cm) and length (100 cm) worked out in the previous step.

5. Now it’s the time to do some shirring! Use regular thread in the top spool holder. The colour should match your fabric. The bobbin should be wound by hand, putting about as much tension on the elastic as you would if hand-winding a normal thread: Don’t pull it tight on the bobbin, but also don’t allow it to be slack.

6. The top tension should be set slightly lower than usual. Also, the stitch length will need to be lengthened. It’s worth trying to see what works on a test piece of fabric first.

7. With the fabric right-side up, sew in parallel rows, using the presser foot as a guide. Start by lining it up with the edge of your fabric – this will be where you make your first line of stitching.

8. The machine sounds worryingly louder when shirring, but this doesn’t seem to be a problem. Continue shirring subsequent lines. It gets a bit trickier as you add more lines and it’s necessary to hold the fabric flat as you sew, but not pull the fabric through the machine. If the elastic runs out half-way through the line, just rewind the bobbin and continue with the line where you left off, just secure the stitching with a few backward stitches.

Coathanger (shirring close-up)

9. For my coat hanger fifteen lines was sufficient to cover the front and back of the coat hanger with elasticated fabric. You may need less or more, depending on how padded you wish your hanger to look. When you’ve completed all your shirred stitching, place the shirred fabric right sides together and sew a seam with a 1cm seam allowance to create a tube. Leave a 1-2cm opening in the seam so that you can fit the hook through.

Coathanger (shirred fabric)

7.  Sew up one end of the tube, again with a 1cm seam allowance. You will need to leave the other end open to insert the hanger.

8. Turn the fabric tube the right way out and feed the hanger into it.

9. Close the opening on the open end using slip stitching

10. Screw the hook back into the hanger.

11. I decided that the metal hook of the coat hanger didn’t look very slightly. I decided to cover this with my fabric too. Cut a bias strip from my fabric. Next, fold the strip in half, right-sides together and sew the length of the strip. Trim so there is not too much excess fabric. Using the loop turner turn the strip to the right-side creating a fabric tube.

Coathanger (bias strip)

12. Pull the fabric tube over the hook and secure in place with a few stitches. Don’t worry about being too neat as this will be hidden by the ribbon.

13. Add a ribbon to mask the hole the hook goes through. Cut the ribbon to the right length. Fold the ends of the ribbon over and sew them in place to prevent the ribbon from fraying.

Coathanger (finished)